Tuesday, February 28, 2012

6 Ways to Bestow Spring in a Mug!...

Spring is certainly a time of celebration and smiles as mother nature slowly wakes up from her long winter's nap. I always look forward to the warming of the mornings and the chance, to at last, take my hot cup of coffee or tea outdoors and explore the latest buds and blossoms in the garden. It's a lovely way to wake up and start the day. As the two go hand in hand, I thought I would have a litte fun and share with you 6 Sweet Ways to Give the Gift of Spring in a Mug! I currently have 2 illustrated mugs available in my Zazzle Shop that promise to make the perfect spring gift to both family and friends (or yourself!). Whether it's in celebration of Easter, the changing of the seasons, a birthday, a thank you, a hostest gift or just an act of simple kindness, these suggestions promise to bring smiles to those you share them with. The mugs are certainly custom and unique and serve as a functional base and vase for whatever you choose to fill it with in your presentation. The ideas are certainly endless, and if you have more, please feel free to share them here with our readers. Enjoy and THANK YOU for spreading smiles through my art!

~ Johanna

Daffodil-Chick-Mug

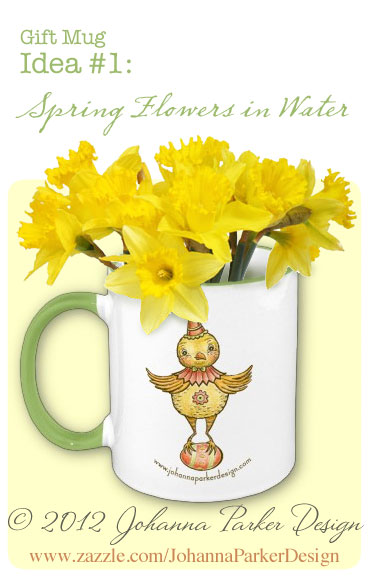
* Idea # 1 gets top ranking with me as it is probably the easiest and most cost effective to produce. Plus, the results are so dear! Spring invites a whole host of flowering bulb plants that often pop up all over the landscape. Snip a few from here or there. Daffodils are always a favorite, so just trim them to height and place in water. If your flower-filled mug must go on a journey before it is gifted, then anchor your flowers in wet floral foam, cut to size. This keeps those pretties fresh and firmly grounded while eliminating the splashing of water and potential spills.

Bunny-Lollipop-Mug

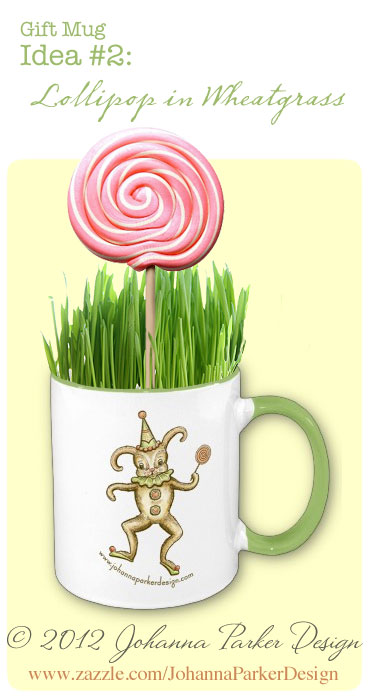
* Although Idea # 2 takes a little more work, the results are too sweet for words! A tuft of fresh wheatgrass spells out spring, and health-minded folks love to juice it in their smoothies. Wheatgrass can be found at most health food grocers in the produce section. Purchase a square of it and cut it to size and stuff it into your mug. Alternatively, with more time and patience, you can grow your own with organic soil and wheatgrass seeds. With a little care, your grass will be perky in 10 days or less. I poked a pink lollipop in for pizazz, but again the ideas are endless. The recipient can keep the lively mug in their windowsill till the grass is used or fades, or they can even share it with their feline friends who also adore this green treat. In the end, they are still left with an adorable mug. Just wash well and enjoy!

Bird-Cocoa-Bean-Mug


* Idea # 3 is the choice for your chocolate & coffee loving friends! I chose dark chocolate covered coffee beans to go with the coffee mug theme. A simple cellophane bag and pretty bow will do the trick. Other suggestions may be chocolate covered nuts or other cocoa-themed sweets. Take it a step further and fill a cellophane bag with homemade chocolate chip cookies ~ YUM! Now, that woud certainly taste quite delightful with a cup of spring coffee in one of my sweet mugs :)

Bunny-Carrot-Mug

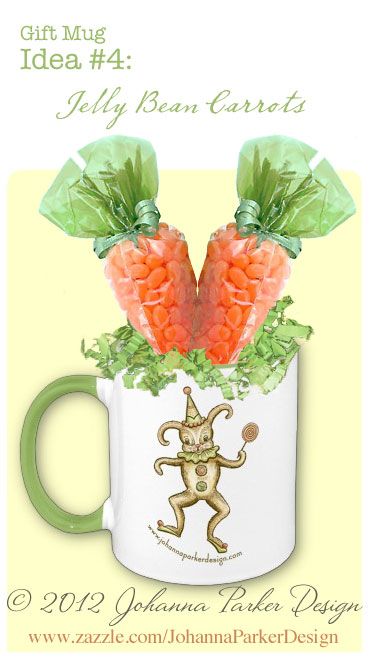
* Idea # 4 is certainly for those with a sweet tooth! Fill carrot cellophane bags with orange jelly beans and ground them in a base of spring green paper packing grass. These bags are easily found online. Do a search for "cone shaped cello bags" or "carrot cellophane bags" and you should find a variety of vendors offering cone shaped packaging, perfect for this sweet application!

Bird-Peep-Mug

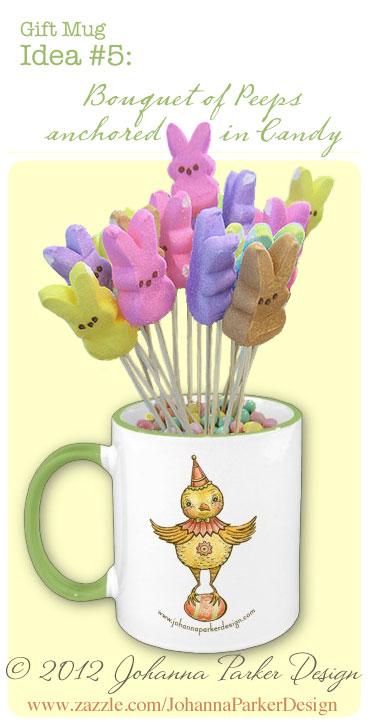
* Idea # 5 takes sugar to a higher level of sweetness! Make a bouquet that celebrates the well-known "peep"! Poke these marshmallow bunnies or chicks into wooden skewer sticks, cut to length if necessary and anchor them into a mug fill with spring-hued candies, such as M&M's. What an adorable hostess gift this would make at a spring party. Suddenly, your unique gift takes center stage!

Chocolate-Bunny-Mug

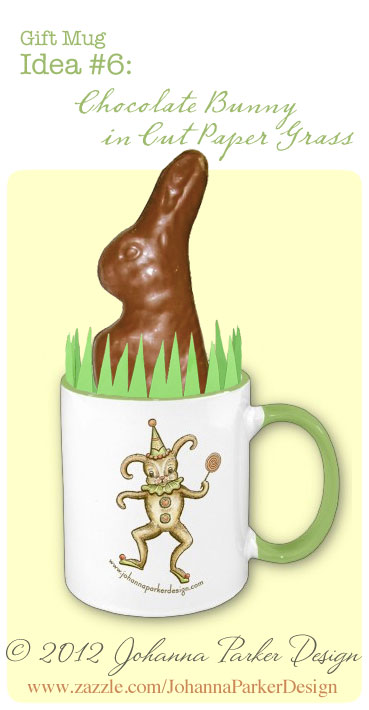
* And Idea # 6 showcases the traditional chocolate bunny. Make sure to purchase one that will fit snuggly in your muggly :) With a little spring green construction paper and scissors, cut a continuous strip of zig-zaggy paper grass. Cut to fit the diameter of your mug, tape it end to end and tuck it down & around your bunny. If you find him wiggling around too much, tuck a little tissue paper down below and around him to set him just right, and add those decorative blades as your final touch!

I hope I have inspired you with these 6 Sweet Ideas to Bestow Spring in a Mug! As I said earlier, please feel free to comment with more fun ideas. Sharing is caring, and it is always FUN to hear from you.

Now, go pick up a SPRING MUG or 2 from My Zazzle Shop!  Thank you for your support & kindness...

Follow Me on Pinterest

Sunday, February 19, 2012

Postage with a Spring Flare...

Spring will soon be in the air, and I look forward to its arrival! Due dates for spring 2013 licensed products have been my focus this month, and the imagery I have been creating inspired a new series of 6 spring-themed postage stamps. I know that the USPS is in decline, as we all become more and more computer savvy with our communications and correspondence. But, I personally dislike the thought of losing its service. I always enjoy receiving cards, notes and parcels from family and friends. And sometimes, opening the mailbox can be quite a treat!  The very way a letter can be beautifully addressed with the personal touch of a dear friend's penmanship is like nothing else. The color of the envelope, feel of the paper pressing against your anxious fingers, along with stickers and sweet postage stamps complete the package and raise the level of anticipation to open it! In celebration of this centuries-old tradition, I am now offering to you, a whimsical collection of my illustrated postage stamps, now available in my Zazzle Shop. Apply them to your Spring & Easter cards and correspondence or to seasonal party invitations, promising both smiles and lots of fun. These butterflies, bunnies and birds will bring frolic and cheer to those lucky recipients. Make your messages memorable and sweet while also keeping the history and tradition of sending and receiving postal mail alive.

Than you!
~ Johanna


To Purchase my Illustrated Postage Stamps & more delightful products, click HERE...

Follow Me on Pinterest

Tuesday, February 14, 2012

Have a Lovely Day!...

I bet some of you faithful fans of Jack were wondering if our 4-legged friend would be making a special appearance on my blog today. Fortunately, the answer is yes! His mood was quite chipper over the weekend, so we deemed it just the right time to make our move. I grabbed a few props, and after he heard the rustle of the red and white paper garland, his ears perked up and he rushed to my feet. I draped it around him in various ways, and he began prancing all about. He LOVES the attention! We noticed that he also LOVES my latest pair of Valentines lovebirds from my Bethany Lowe line. We perched them here and there for Jack to sniff and greet, snapping photos along the way. I know you might be asking where is his latest Valentine's hat and all? Well, me and the 'ol clock have a less-than-loving relationship, so maybe next "time".... For now, enjoy our silly little series of a cat and bird love affair. I hope they give you warm fuzzies too :)

Wishing you a LOVELY-fun Valentine's Day!

xoxo,
~ Johanna, JP & Jack


Be-Mine

Jack-&-Bird-friends

Kiss

Sniff

Love-Triangle

Hehehehehe......

Follow Me on Pinterest

Photos © Johanna Parker Design, LLC

Friday, January 27, 2012

Just Flirting...

February is fast approaching, and the month of love has inspired me to create an intimate group of heart-themed folk art characters! It is rare that I make time to create for this special holiday, but the subject matter and palette delight me, and well, I flirted with the idea. Fortunately, I just completed a handful of Valentines friends, and I will be revealing them on the evening of February 1st! I only have six little treasures to offer, so if you are interested, please make sure that you have joined my Mailing List. On Wednesday, I will send out a Newsletter to your inbox announcing that my sale will start within that same hour. For now, I thought I would tease you with what's in store. OH, those little flirts!!!

xoxo,
~ Johanna


Valentines-Collage
* I know, I may be getting a little too up close and personal here! hehe.....

Wednesday, January 18, 2012

Stocking Up...

The rich colors and textures of last night's medley of vegetable scraps, brewing together in a pot inspired this post. Have you ever made vegetable stock? It's so simple! Almost a year ago, JP and I took a couple's cooking class at Nourished Health Wellness Center in Denver, and we learned this simple way to use all the parts of our vegetables. Now, whenever I cut the tops and bottoms off of an onion, and peel its skins, I toss them all into a gallon-sized ziplock bag. The heads of carrots, ends of asparagus, insides of peppers, old garlic, extra greens and other common veggie discards that I used to toss into the trash, now all end up saved and stored in this bag. You'll find it full of bulging vegetable remnants in our freezer and easily accessible every time I chop produce for a salad or prepare a meal. And yesterday, I decided that this bag was plenty full, and therefore, time to make vegetable stock!

Veggie-Stock-at-first

I poured its colorful contents into a big pot and filled it with water, submerging all the cuttings. I turned up the heat to high to promote a boil and to warm up all those frozen vegetable bits. Soon, tops of peppers, carrot trimmings, herbs and such began to glisten, and JP and I oooh'd and aaah'd at the variety of colors. Shortly after, out came the camera!

Vegetable-Stock-close

Looks yummy, doesn't it?  And a hearty garden aroma began to fill the house... What a delightful scent on a cold, wintery night.

Checking-the-stock

I love how the simple things in life can generate smiles and good times.... Clearly, making your own vegetable stock falls into this category ~ or at least it does for us!

Bring-to-a-boil

Finally, we had a rolling boil, bubbles and all! Then, I turned the heat down to a simmer, covered the pot and allowed the water and veggies to work their magic...

Veggie-Stock-Pot

While we waited for the stock to form, we had a little fun! Is that really the reflection of me and JP peering back at us from the face of the stock pot?  Hehehehe!

Vegetable-Stock-ready

After about 3 hours or so of simmering, we lifted the lid to find a dark amber liquid had replaced the clear water from earlier. The vegetables were soft and muted, and the colors not so bright, but the stock was taking shape. A hearty smell of rich vegetables filled our nostrils ~ yum! I turned the heat off and located the heavy pot to an iron trivet for cooling.

Lastly, after a few minutes of straining out the vegetable remnants, we had ourselves a luscious vegetable stock. Measuring out 2 cups at a time, we poured the liquid into a series of quart-sized freeze-proof ziplock baggies. I recommend labeling the bags first with a quick note of contents and amounts before filling them.  Once they are filled and zipped, laying & layering them in a large glass casserole dish is best and easier to separate once they are frozen. And yes, all go into the freezer and await for just the right time when you need a splash of stock for a stew, soup or whatever you feel like making. When that time arrives, just pull out a frozen stock bag, run it under warm water for a few seconds until you feel the
icy chunk dislodge. Then, just release it from the bag into a pot, warm it on your stove, add a little salt and pepper and enjoy your vegetable broth. Yield: 9 1/2 cups of veggie stock......Enjoy!

Happy cooking!
~ Johanna