


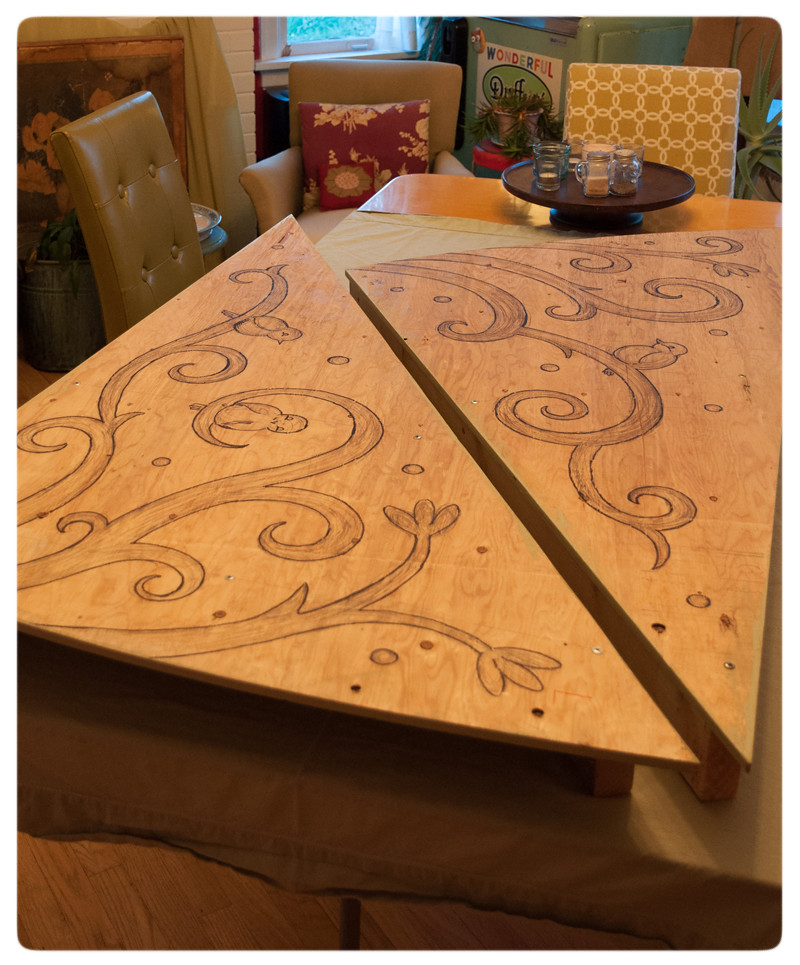
* After I pencil-sketched my design in place outside on the the front gables, JP removed the halves and brought them indoors for me to work on. Then, I roughly outlined the art in black marker pen.
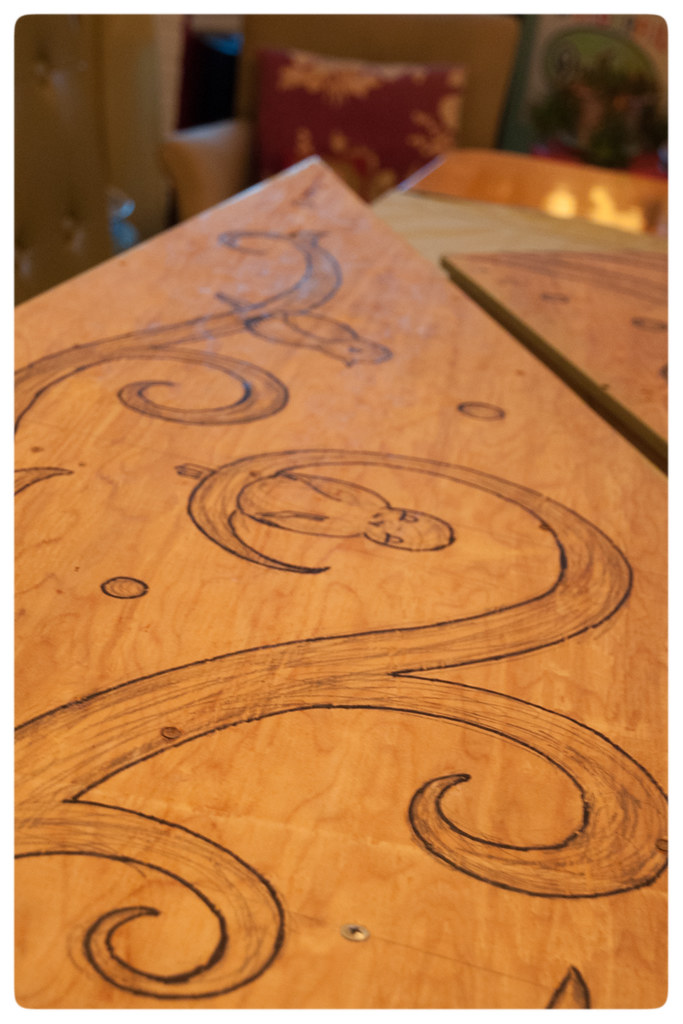
* Scrolling vines, perching birds, dots, and....
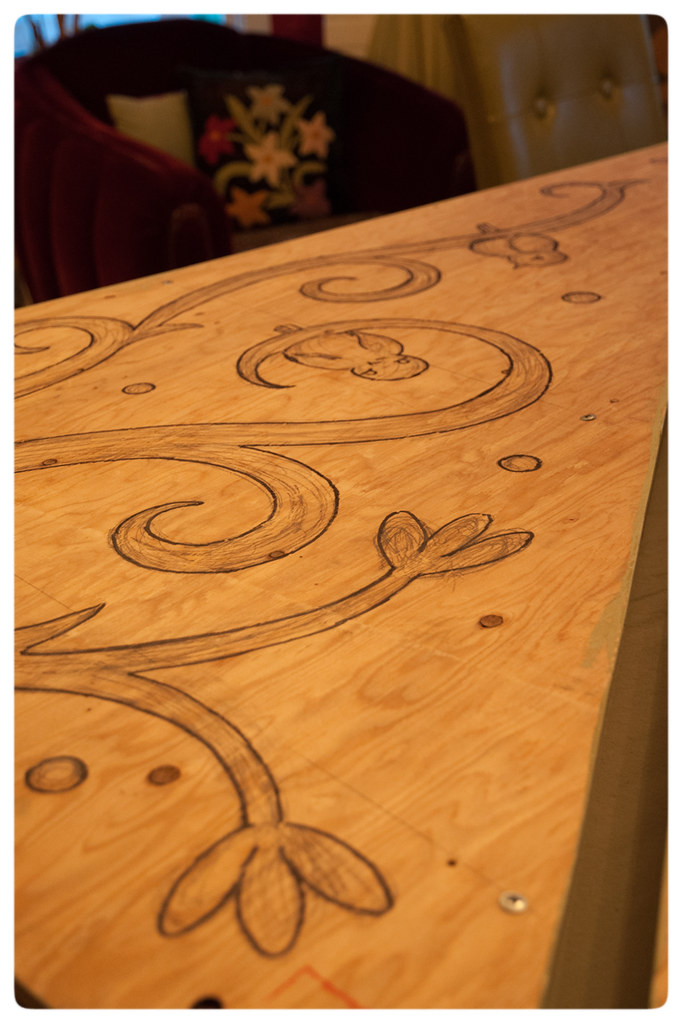
* Flowers of course!.....

* After the lines were drawn, I spent a few days adding layers of papier mache skim coat to cover the plywood. I roughly filled in the spaces between the design with this layer build.
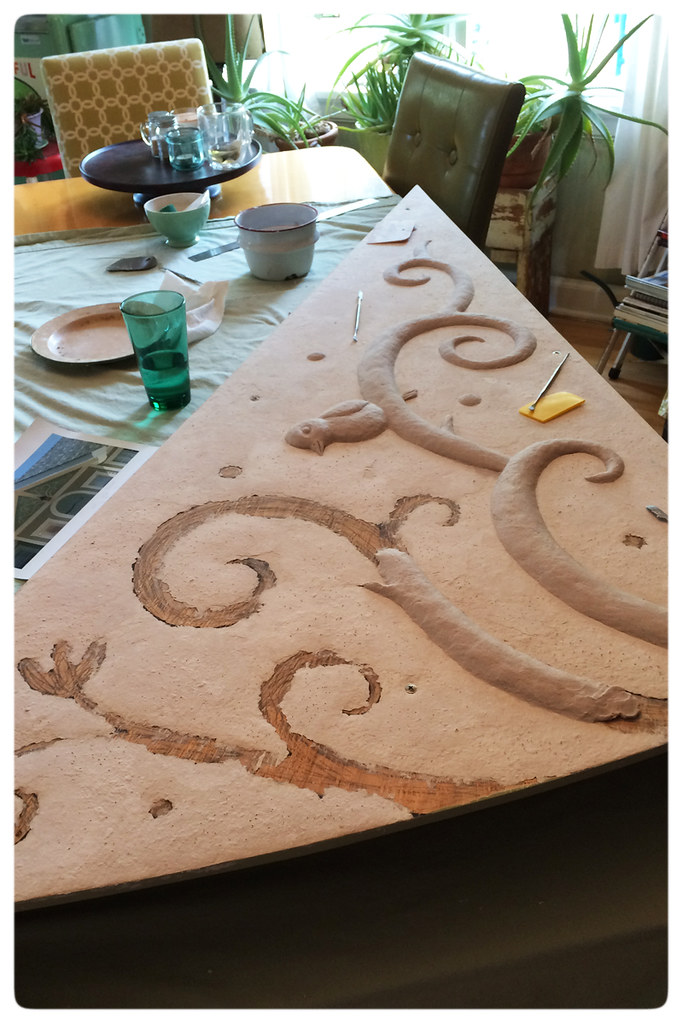
* Once the base dried, I began filling in the elements with a thick layer of papier mache to create dimension...
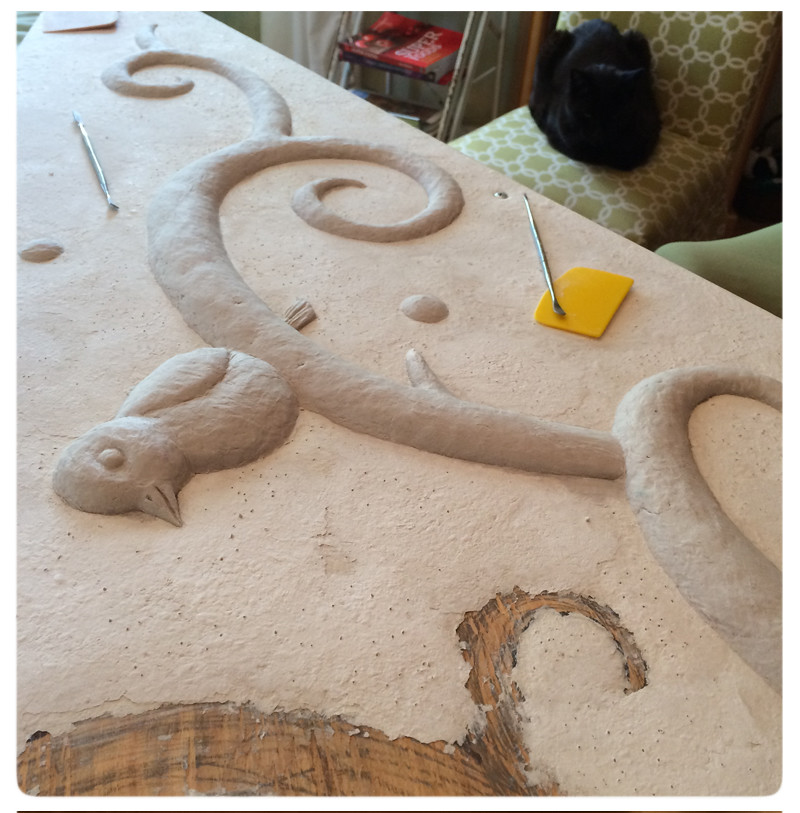
* The shapes and characters started to pop with this step! All have been drying out in the sun, awaiting the last layer of papier mache that will create the dimensional texture I hope to achieve. Wish me luck, and check back for more updates soon! (And yes, Jack enjoyed watching me work in a novel place. He was initially intrigued with my project, although I think he's sleeping in this photo :)


